

Wall-mounted mini split systems are a popular choice for adding efficient heating and cooling to bedrooms, living rooms, home offices, garages, additions, and other individual spaces. They do not require ductwork, offer flexible placement, and provide room-by-room comfort.
However, good performance starts with proper installation. A mini split that is sized, placed, and connected correctly can deliver quieter operation, better efficiency, and longer service life.
If you're planning to install a wall-mounted mini split, here are seven essential tips to help ensure the best results.
1. Choose the Right Capacity
Before installing a mini-split, make sure the system capacity matches the room. A unit that is too small may run constantly and still struggle to keep the space comfortable. A unit that is too large may turn on and off too often, which can reduce humidity control and affect efficiency.
When selecting a model, consider room size, ceiling height, insulation, window exposure, local climate, and how the space is used. For rooms with large windows, poor insulation, high ceilings, or strong sun exposure, additional capacity may be needed. If you are unsure, consult a qualified HVAC professional before purchasing.
→ TOSOT mini split size calculator
→ Sizing Chart for Mini Split AC
2. Plan the Indoor Unit Location
Proper placement of the indoor unit helps distribute conditioned air evenly throughout the room. For optimal airflow:
- Install the unit high on the wall.
- Keep it away from curtains, furniture, and tall cabinets.
- Leave enough clearance for maintenance and filter cleaning.
- Choose a location that provides a direct path for refrigerant lines, drain tubing, and electrical wiring.
It's also best to avoid directing airflow straight toward beds, desks, sofas, or seating areas where occupants remain for long periods.
3. Install the Outdoor Unit with Enough Clearance
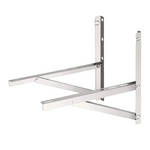
The outdoor unit needs open airflow to operate efficiently. It should be installed on a level, stable surface, such as a ground pad or a properly rated wall bracket. Make sure it is secure and protected from standing water, heavy snow, leaves, roof runoff, or hot exhaust from nearby vents.
Clearance around the outdoor unit is also important. Restricted airflow can reduce performance and make the system work harder. Leave enough space for both ventilation and future service access.
4. Handle Refrigerant Lines Carefully
Refrigerant line installation is one of the most important parts of the process. The line set should be routed neatly, insulated properly, and protected from kinks or sharp bends. Always follow the model-specific installation manual for line length, height difference, flare connections, and torque requirements.
In many installations, the refrigerant circuit must be evacuated with a vacuum pump before the system is started. This helps remove air and moisture from the lines. Leak testing should also be completed to confirm all connections are sealed correctly.
5. Make Sure Drainage Works Properly
During cooling mode, the indoor unit removes moisture from indoor air. This condensate must drain away efficiently. The drain line should:
- Maintain a continuous downward slope
- Avoid loops or low spots where water can collect
- Remain free of obstructions or pinched sections
After installation, pour water into the drain pan or use the unit's test function to confirm that water flows freely. Poor drainage can lead to water leaks, mold growth, wall damage, and unnecessary service calls.
6. Check Electrical Requirements
Mini split systems must be connected according to the product specifications and local electrical code. Before installation, confirm the required voltage, breaker size, wire size, grounding, disconnect location, and communication wiring between the indoor and outdoor units.
Electrical work should be completed by a licensed electrician or qualified professional. Incorrect wiring can damage equipment and create safety risks.
7. Finish with a Complete Startup Check
Before putting the system into everyday operation, perform a complete startup check. Verify that:
- The indoor unit is securely mounted.
- The outdoor unit is level and stable.
- Refrigerant connections are leak-free.
- Drainage is functioning properly.
- Electrical connections are secure.
- Cooling and heating modes operate correctly.
- The remote control and system settings function as expected.
Taking a few extra minutes to complete these checks can help prevent future performance issues.
Final Thoughts
A wall-mounted mini split system can deliver quiet, energy-efficient comfort for years when installed correctly. Choosing the right capacity, positioning both the indoor and outdoor units properly, protecting refrigerant lines, ensuring reliable drainage, and completing a thorough startup inspection all contribute to long-term performance.
Although some preparation work may be suitable for experienced DIY homeowners, refrigerant handling and electrical connections should always be performed by qualified professionals.
Whether you're installing a new system in a single room or upgrading your home's heating and cooling, taking the time to install your mini split correctly is one of the best investments you can make.
More Tips for Installation
DIY Mini-Split Installation + Custom Cover: Preethi’s Workspace Transformation