

Installing a standard wall-mounted mini split is one thing. Cooling a pole barn with multiple ceiling heights, lofts, and hard-to-reach areas is another. In this real-world project, a TOSOT 34,000 BTU ducted mini split is installed with exposed spiral ductwork to distribute air evenly while keeping the indoor unit hidden in the loft. This guide breaks the installation into eight practical steps.
⚠️Safety first: Mini-split installation involves high-voltage wiring, refrigerant connections, structural mounting, and local code requirements. Hire a licensed HVAC technician and electrician for any work you are not qualified or legally permitted to perform.
Before You Start

Confirm the building's heating and cooling load, the indoor and outdoor unit clearances, the required electrical service, and the permitted line-set length. This installation uses a roughly 3-ton-class variable-speed unit in an insulated 28-by-32-foot pole barn, but equipment sizing should always be based on the actual building and climate—not this example alone.
Useful tools and materials shown in the video include a torque wrench, vacuum pump and gauges, line-set bending inserts, condensate pipe, disconnect box, electrical whip, laser level, jigsaw with a metal-cutting blade, spiral duct sections, adjustable vents, and cable hangers.
Step 1: Plan the System and Airflow
Choose an indoor-unit location that provides service access and a direct path for the supply duct, return air, condensate drain, line set, and wiring. In this project, the air handler is hidden in unused loft space above the garage door. The spiral duct runs along the center of the barn to help serve areas with different ceiling heights.
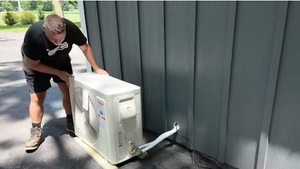
The outdoor unit is positioned around the corner, protected from traffic and weather while maintaining the clearances required by the installation manual.
Step 2: Prepare and Mount the Indoor Unit

Complete easy-to-reach connections before lifting the indoor unit into place. The installer connects the communication cable and thermostat lead on the ground, then attaches the custom transition that joins the air handler to the round spiral duct.
Lift the unit safely, support it according to the manual, and mark the return-air opening below the unit. Avoid sharp 90-degree transitions at the supply outlet; smooth curves or 45-degree fittings reduce airflow restriction.
Step 3: Run the Line Set and Communication Cable

Drill a properly located wall penetration, then route the insulated copper lines between the indoor and outdoor units. Keep the protective caps in place until the connections are ready, and form wide, controlled bends so the tubing does not kink.
Run the communication cable alongside the line set and secure the bundle neatly. Make the flare connections with the correct tools and tighten them to the torque values specified in the TOSOT manual. Re-insulate every exposed refrigerant connection to prevent condensation.
Step 4: Install the Condensate Drain

The indoor unit provides both gravity-drain and pumped-drain options. The video uses the gravity outlet to reduce reliance on a mechanical pump. Route the drain with a continuous downward slope, secure every joint, and seal the connection at the unit as specified by the manufacturer.
Before closing the area, test the drain with water and confirm that it flows freely to an approved discharge point without leaks or standing water.
Step 5: Position the Outdoor Unit

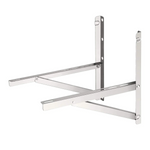
Set the condenser on a level, stable, elevated base and preserve all required service and airflow clearances. Connect the refrigerant lines using the same careful flare and torque procedure used at the indoor unit.
Protect the tubing, wiring, and wall penetration from weather and physical damage. Any excess line-set length should be arranged without tight coils or sharp bends.
Step 6: Evacuate, Leak-Test, and Complete the Electrical Work
Connect a vacuum pump and proper gauges, evacuate the line set, then isolate the pump and verify that the vacuum holds. A stable reading helps identify a leak before refrigerant is released, but the target vacuum, test method, and hold time should follow the product manual and professional HVAC practice.
Install a code-compliant disconnect within the required location and connect the outdoor unit, indoor communication wiring, and dedicated circuit. Keep power off until all terminations and covers have been checked. After the system passes its leak test, a qualified installer can open the service valves according to the TOSOT instructions.
Step 7: Build and Hang the Spiral Ductwork

Use a laser and a template to lay out straight, evenly spaced supply openings. Drill a starter hole, cut each opening with a metal-cutting blade, and install the adjustable registers.
Assemble the transition, 45-degree fittings, reducer, and spiral duct sections. Support the duct from the framing with rated hangers, keep the run straight, and seal and fasten every joint using the approved method. Final duct and register sizes should come from a proper airflow calculation.
Step 8: Start Up and Test the System

Restore power and run the system through its operating modes. Check for unusual noise, vibration, condensate leaks, wiring faults, and refrigerant-line sweating. Confirm airflow at every register and compare supply temperatures from the first outlet to the last.
In the video, the completed system produced strong airflow throughout the barn and supply-air temperatures below 60°F at the registers. Actual readings will vary with indoor conditions, load, fan settings, duct design, and commissioning.
Final Checklist
- Indoor and outdoor units are level, secure, and serviceable
- Refrigerant connections are insulated and leak-tested
- Condensate drains freely with no standing water
- Disconnect, breaker, grounding, and communication wiring are verified
- Duct joints and registers are secure and sealed
- Airflow reaches every intended area
- System starts, runs, and shuts down normally
🎥 Watch the full video here:
https://www.youtube.com/watch?v=JDEbq5__NQ8
Frequently Asked Questions
Q: Can I install a ducted mini split myself?
A: An experienced DIYer may be able to complete mounting, duct assembly, and some routing work. Refrigerant commissioning and electrical connections often require licensed professionals, permits, or specialized tools. Check local requirements before starting.
Q: Can I use a rectangular duct instead of an exposed spiral duct?
A: Yes. The spiral duct in this project was chosen partly for its industrial appearance. The system can also be connected to a properly designed concealed or rectangular duct system, provided airflow and static-pressure limits are respected.
Q: How long did this installation take?
A: The installer reports a little over 12 hours from start to finish. A first-time installation, professional inspection, custom fabrication, or more complex duct routing may take longer.
Q: How much did the project cost?
A: The video reports a total just under $4,200 at the time of installation, including the equipment and ductwork. Pricing varies by location, materials, labor, permits, and current product costs.